Are you hosting a website somewhere around the globe? Then most likely, you faced an INTERNAL SERVER ERROR. The error itself states the error is internal, which means it has something to do with the server.
How to debug 500 internal server error?
Mostly there are three reasons which cause Internal Server Error,
- Corrupt/Misconfigured .htaccess file.
- Faulty Plugin/Theme.
- Overextended use of assigned PHP memory (memory_limit).
Moreover, if you face an internal server error as described above in the image, the error is due to PHP or MySQL issues. Specifically, it might be due to max SQL connections reaching inadequate memory limits, broken PHP code, improper file/directory permissions, invalid group ownership, bad vhost configs, etc.
For preliminary steps, you can take the following steps,
Try After some time: On many occasions, this is a time-specific error that will be automatically resolved after some time from the server end, which means you don’t need to take any action from your side.
Clear Browser History & Cache: Try clearing the browser’s history and cookies; this might help work the website back again.
Refresh the page: Sometimes, it might be an error for a temporary purpose. Refreshing the page once, you might see the website loading back again.
How to fix 500 internal server error?
We have discussed enough what is 500 internal server errors and what possible causes. Let’s get started with the actual resolution part.
1. Corrupt/Misconfigured .htaccess file
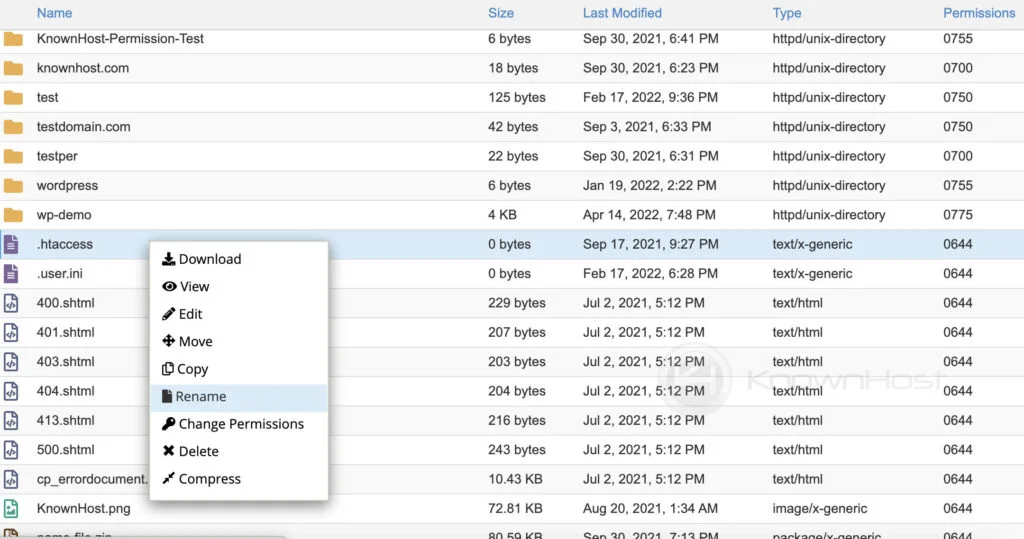
Every request which comes to the server will first pass through the defined set of rules in the .htaccess file. If the .htaccess file gets corrupted or has misconfigured code, the website will face 500 internal server errors. We have already covered the article on How to modify the .htaccess file?; follow the article to make fixes or else rename the .htaccess file to something like .htaccess-bkp.

2. Deactivating Faulty Plugin/Theme
Roughly WordPress dominates the marketplace, and most websites are being deployed using WordPress due to its flexibility and versatility. The open-source and community-driven platform regularly announces required updates for the time being. Most custom plugins/themes or any of the open-source plugins/themes, sometimes might not be compatible with the deployed updates or, in rare cases, conflict with the already installed plugin/theme in WordPress. You have two options to resolve the issue: fixing the problem manually or removing/deactivating the plugin/theme.
How to know it’s a plugin/theme problem? Well, it can be done by enabling the WordPress to debug mode or checking the error_log file, which is situated in the WordPress installation directory.
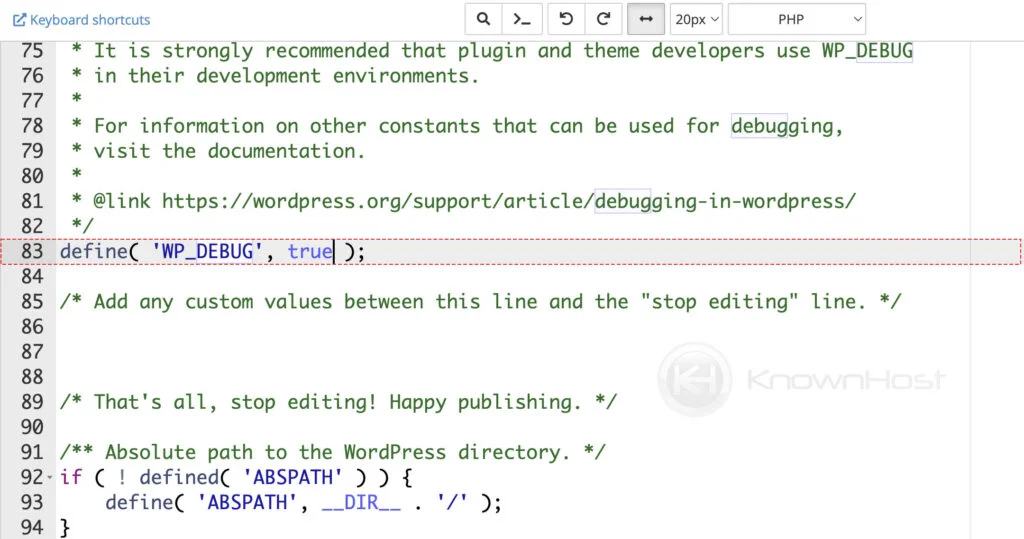
To enable the WordPress to debug mode; make the following adjustment in the wp-config.php file.

Post enabling the debug mode. You can see the error directly browsing the website,

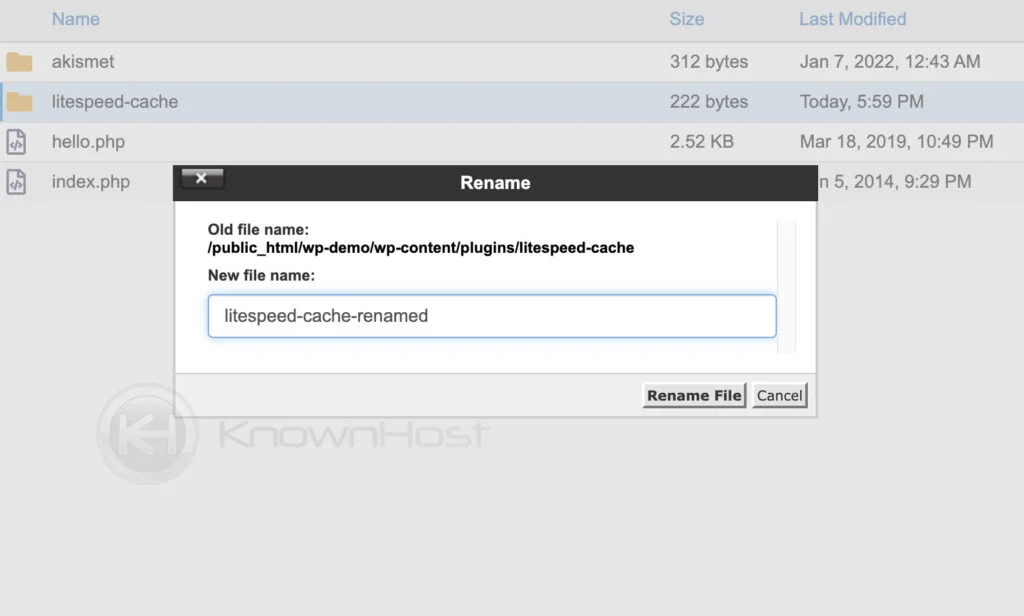
Now, the question is How to disable the plugin/theme if I can’t access the website backend? The answer is RENAME THE DIRECTORY. You might ask, is it real? Yes of course, just navigate to the plugin/theme installation directory and re-name the plugin/theme directory to something else (ex: litespeed-cache-renamed).

If you’re able to access WordPress then navigate to Plugins → Installed Plugins → Find out the faulty plugin, and click on Deactivate.

3. Configuration of PHP memory (memory_limit)
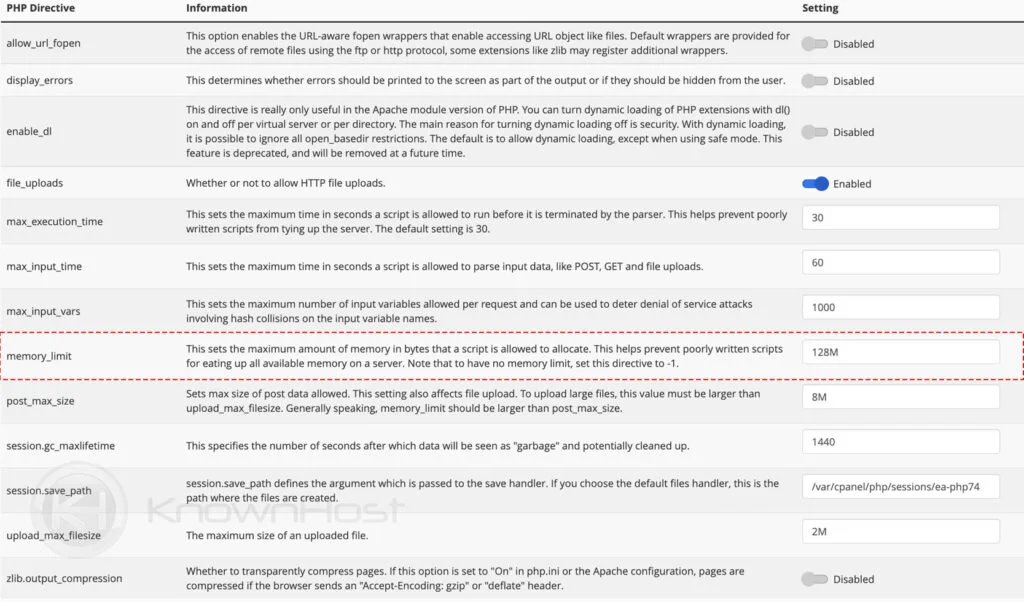
Many hosts do not edit the default copy of the php.ini global setting, in which memory_limit is set at 128MB only, or the custom-configured limit in the php.ini might not be sufficient for your application to run. Due to a lack of PHP memory allocation, your application/website might face 500 Internal Server errors.
To configure memory_limit in the cPanel, navigate to cPanel → MultiPHP INI Editor → Select Domain → Increase the memory_limit as per the requirement.

To configure memory_limit in the DirectAdmin, navigate to DirectAdmin → PHP Setting → Select memory_limit and increase the limit as per the requirement.

After making the changes, refresh the window.


Leave a Reply